While iRacing has some built-in functions to allow a driver to customize the look of their car, the system is limited to a three-color palette and a handful of templates per car, plus an assortment of built-in decal designs with predetermined locations. Fortunately, the majority of the iRacing community—and iRacing itself to a certain extent— has embraced an aftermarket program called Trading Paints which ties to your iRacing account and lets you run any custom livery you can cook up, while also seeing designs your competitors have chosen.
If you're already a custom-livery veteran, scroll to the bottom to see some of our advanced tips for painting in iRacing, and help add to the library by submitting your own advice for others to enjoy. You can skip to that section by clicking here.
Enabling Custom Liveries
Step one is to simply make an account and tie it to your iRacing user ID. (In iRacing, click your helmet in the upper right, then "Account," the top of the popup window has your Customer ID #, typically six digits long for newer users. Write this number down, as it's important later when making your own livery!)
Next, download the Trading Paints app for your computer. All the paint files for cars in a given race are saved in TGA format by default in your computer's Documents/iRacing/paint/ folder, and from there in subfolders for each car with filenames that match each driver's iRacing Customer ID. When you enter a race with Trading Paints running, the default liveries load from iRacing, then the Trading Paints app looks at those numbers and downloads each driver's declared livery from the Trading Paints server to the local folders. It can take a few moments for all the liveries to download in a crowded session, during which time you'll see cars turn blank white for a moment before popping into their full-custom glory.
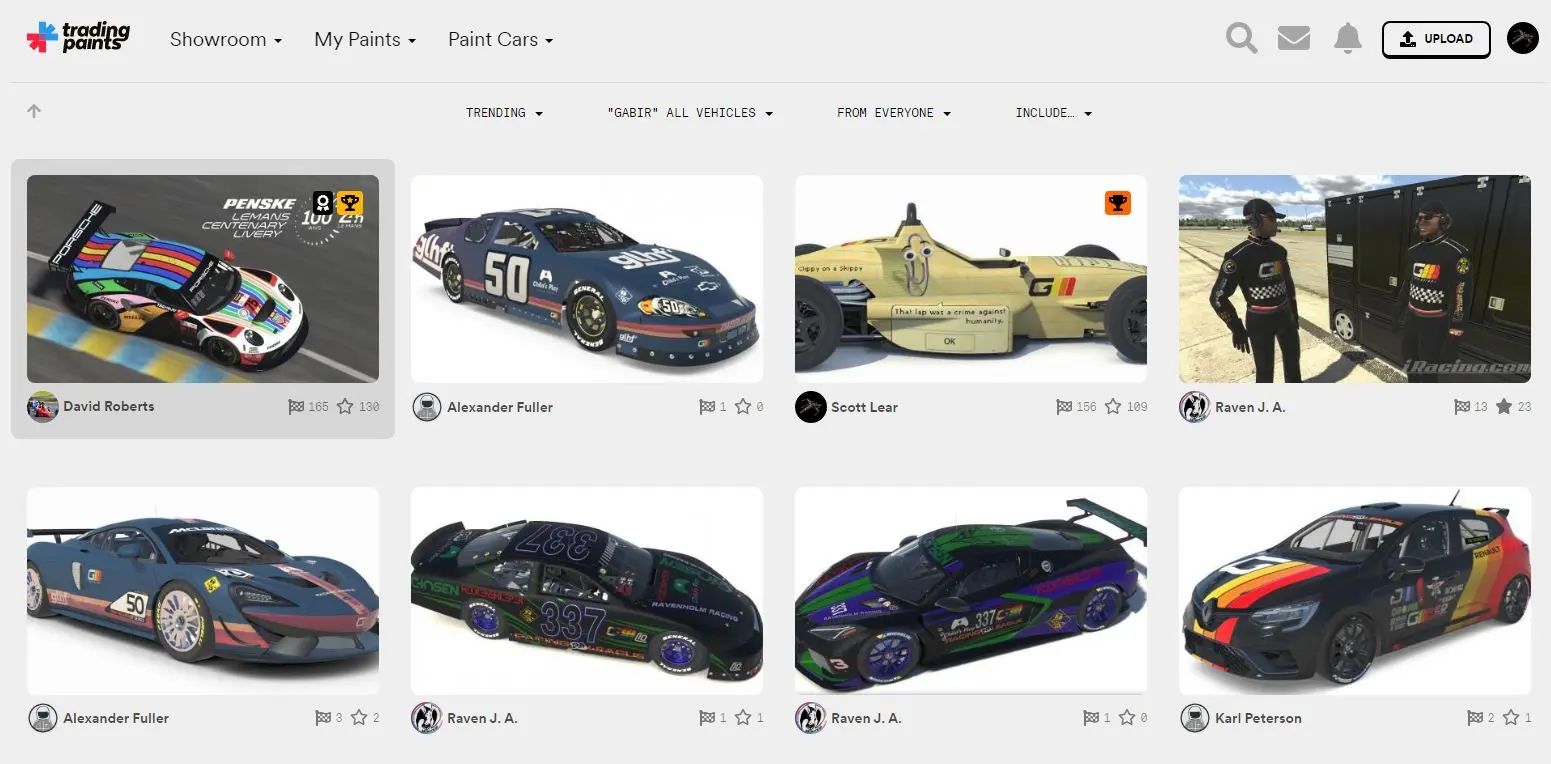
For people who have no interest in doing their own painting, this is enough to get you going! Poke around the Trading Paints website, which is fully searchable by car and keywords, and pick some fun liveries to get started. Simply click "Race This Paint" and Trading Paints will download that car-specific livery to your computer each time you race. Better still, everyone else who's running Trading Paints in your session (assume it's the majority) will see your livery on their sim as well.
That's all you need if you're just looking for a larger library of livery options, but those who are looking to flex their own creative muscle will want to unlock the full potential of iRacing paint schemes.
Making Your Own Livery
The first hurdle is access to photo-editing software that can open PSD files and handle layers. PSDs are the native format of Adobe Photoshop, so that's an obvious choice, but it's also an expensive one. Trading Paints offers a browser-based solution with their $24-per-year Pro subscription, which seems to be a simplified turnkey solution.
This author uses a free open-source editing program called GIMP, which is very powerful but has a steep learning curve. There are tons of tutorials on the web to help bring newcomers up to speed. Did we mention it's free? This tutorial uses GIMP screenshots going forward, but the information should apply to any layered photo-editing software.
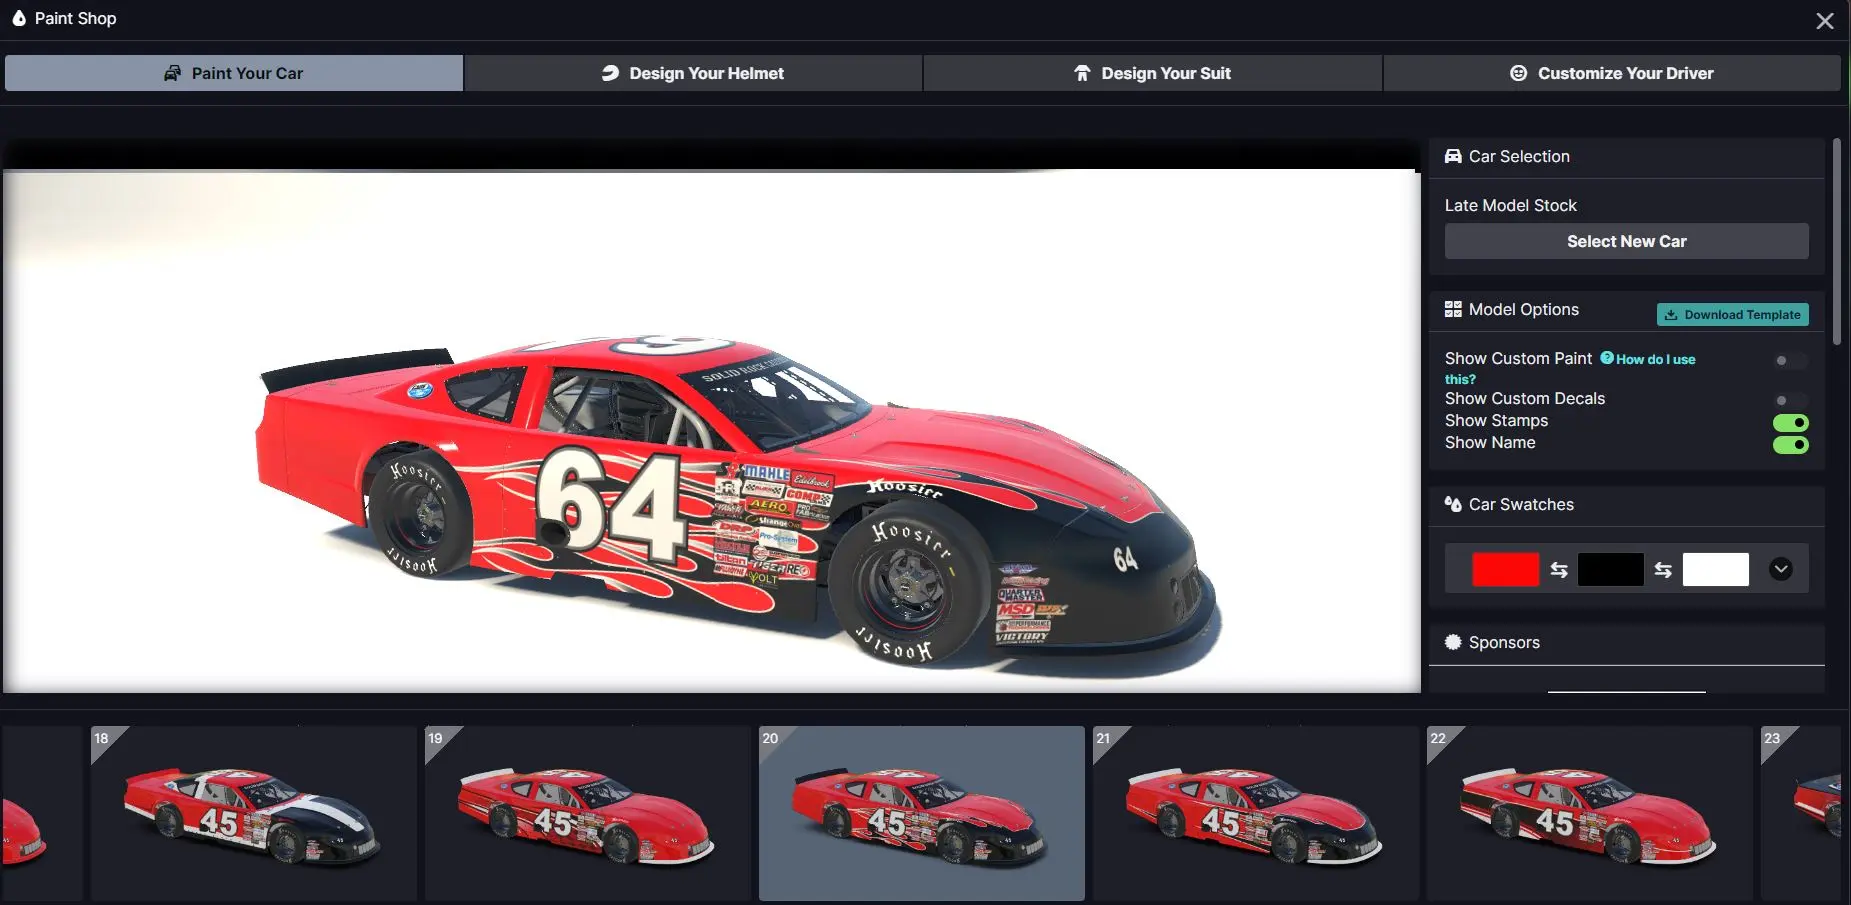
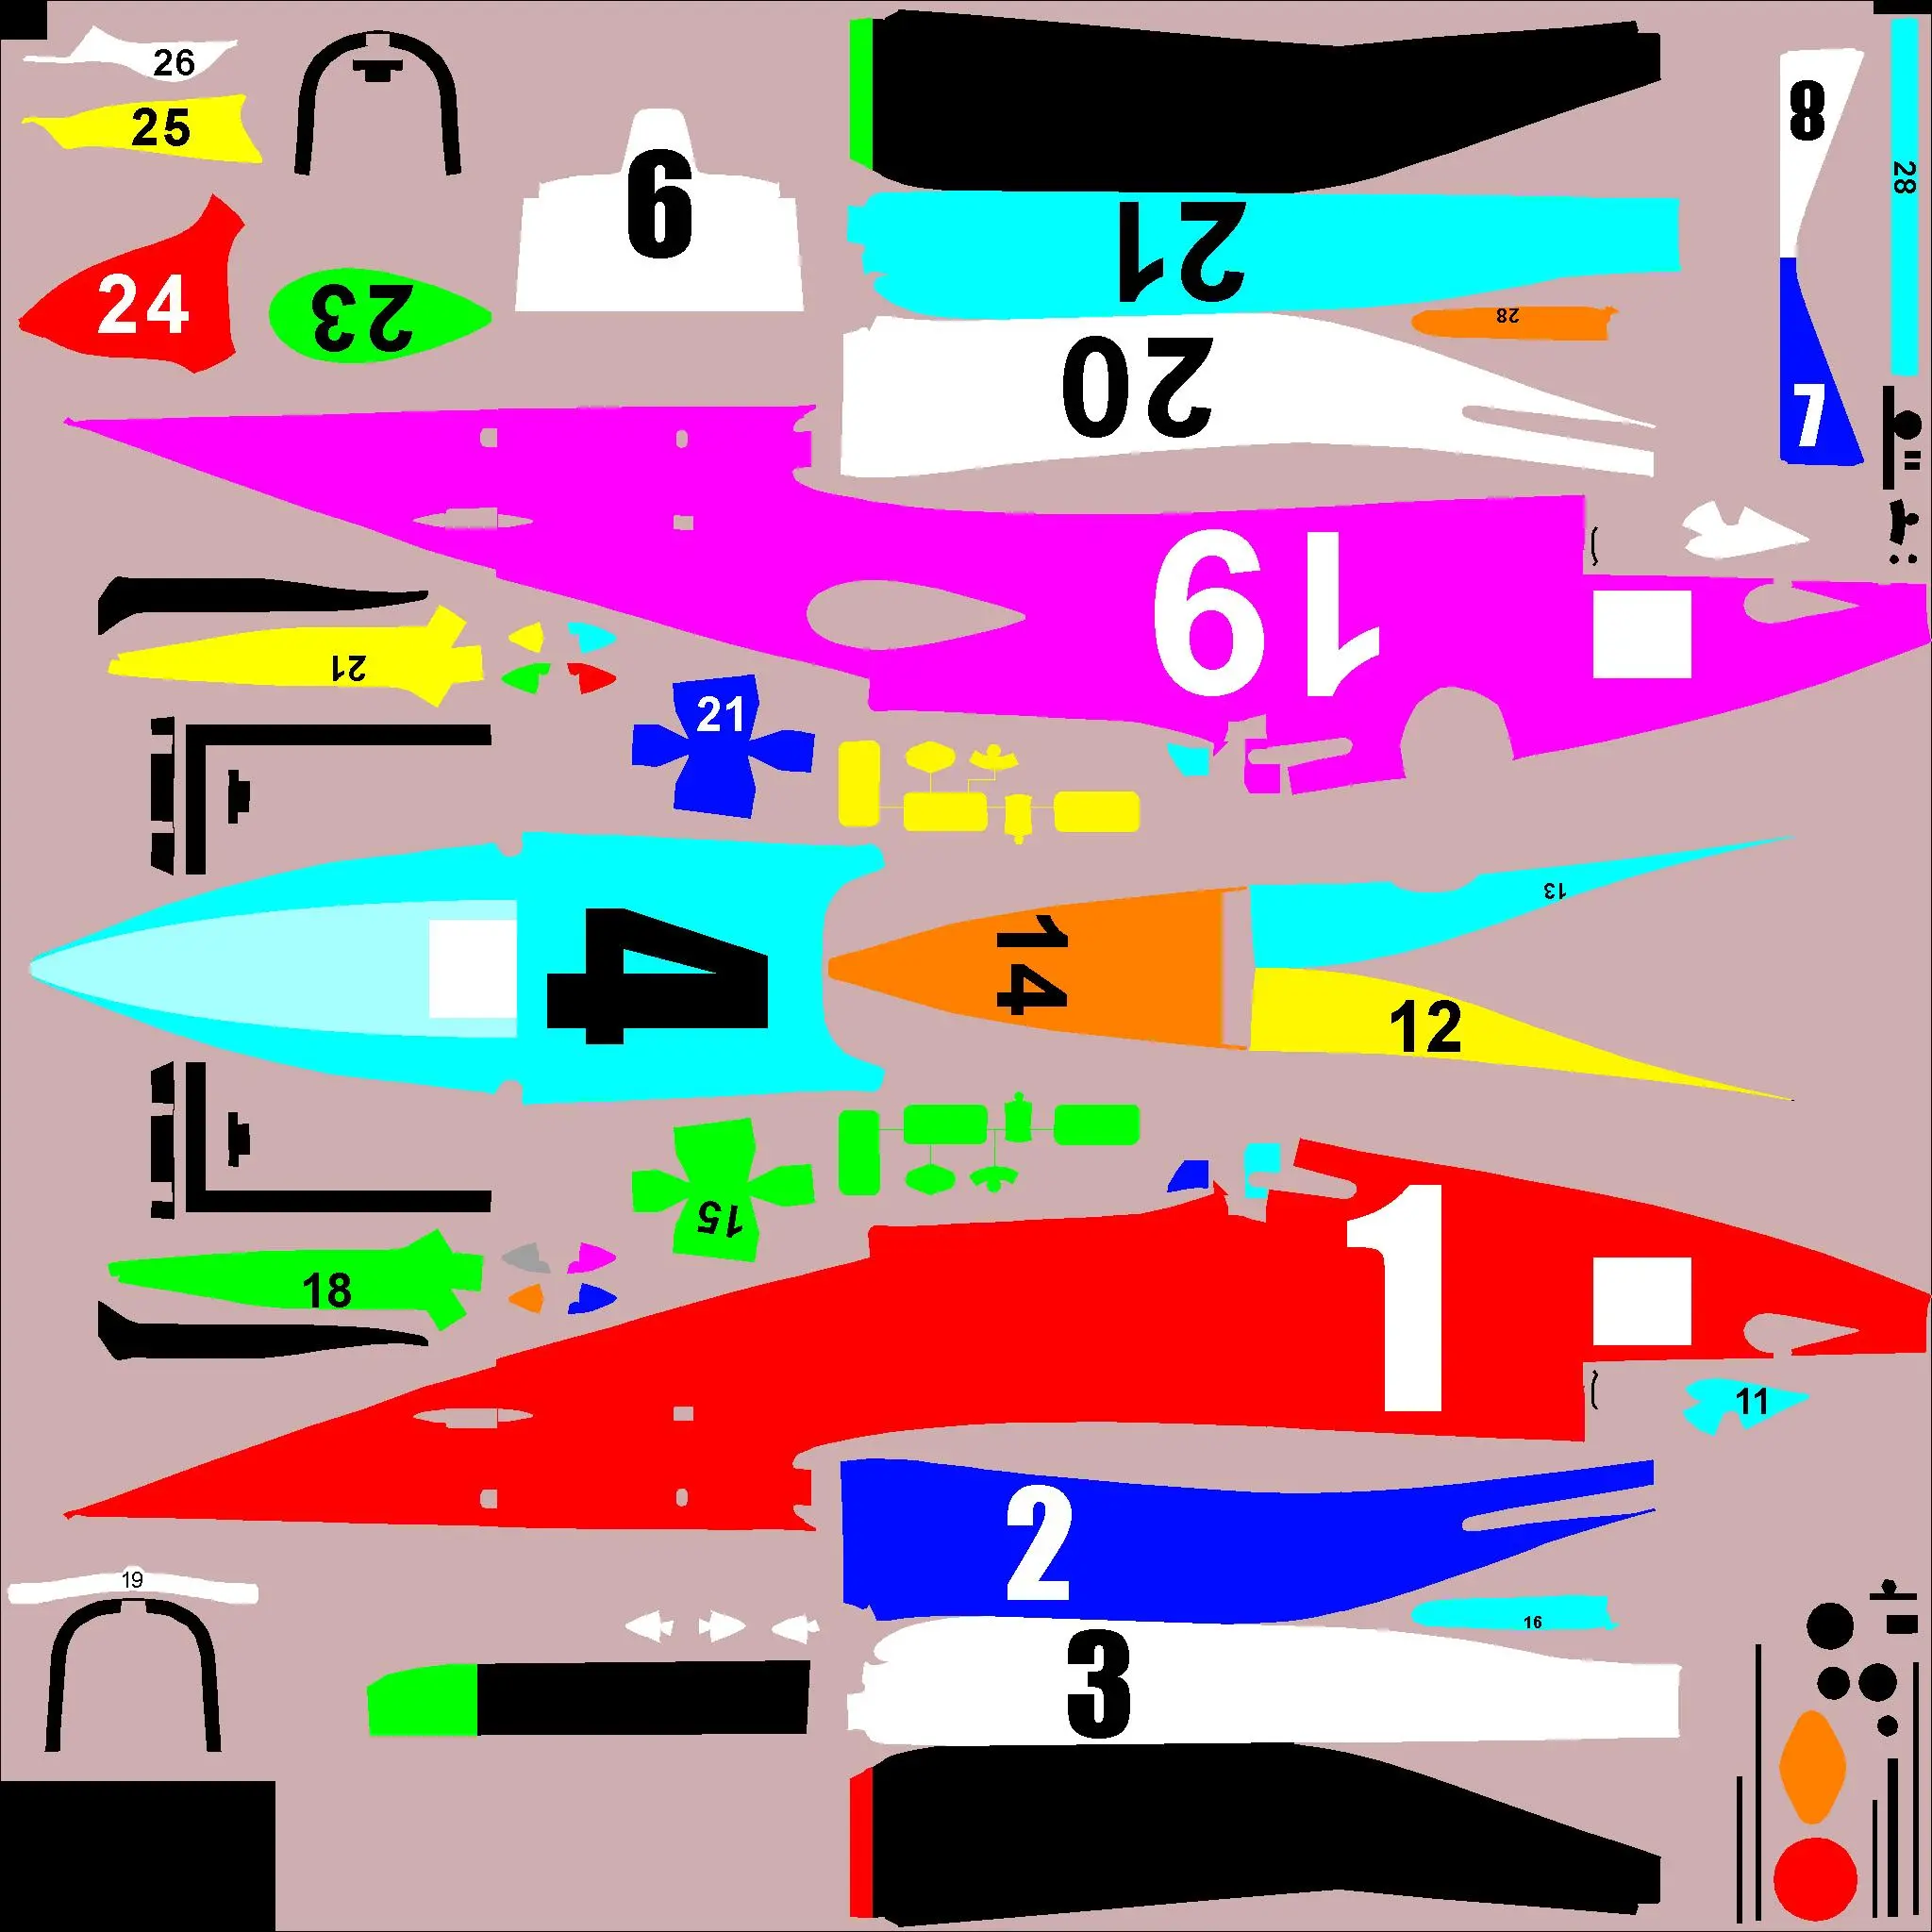
To begin, open the iRacing interface, select the car you want to paint in the "My Content/Cars" tab, then click "Paint Car" at the bottom right. To the right of the 3D model of the car, you'll see a blue "Download Template" button. Open the downloaded ZIP file in your photo editor, and you'll see a 2048x2048 pixel flat representation of every paintable panel on the car. Many cars open in a uniform medium blue, but some have real-world default liveries that have a lot more going on visually.
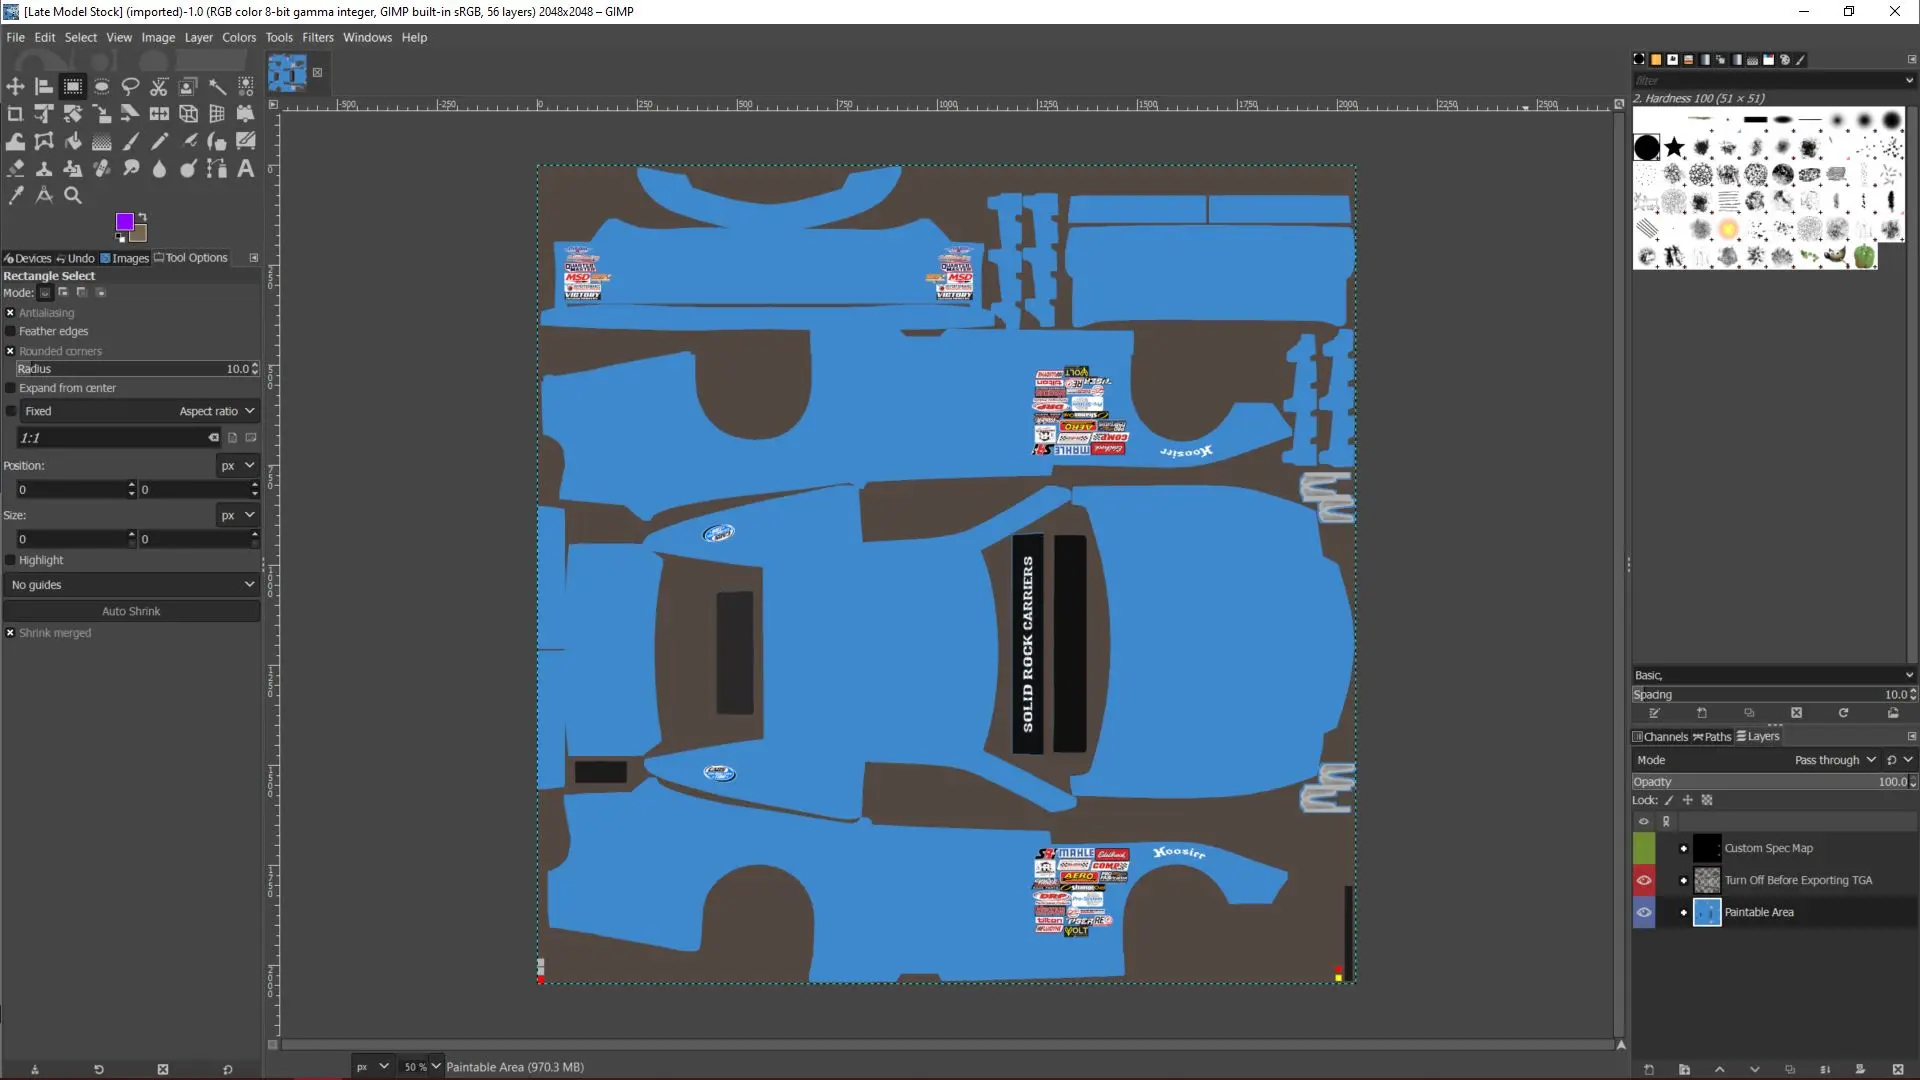
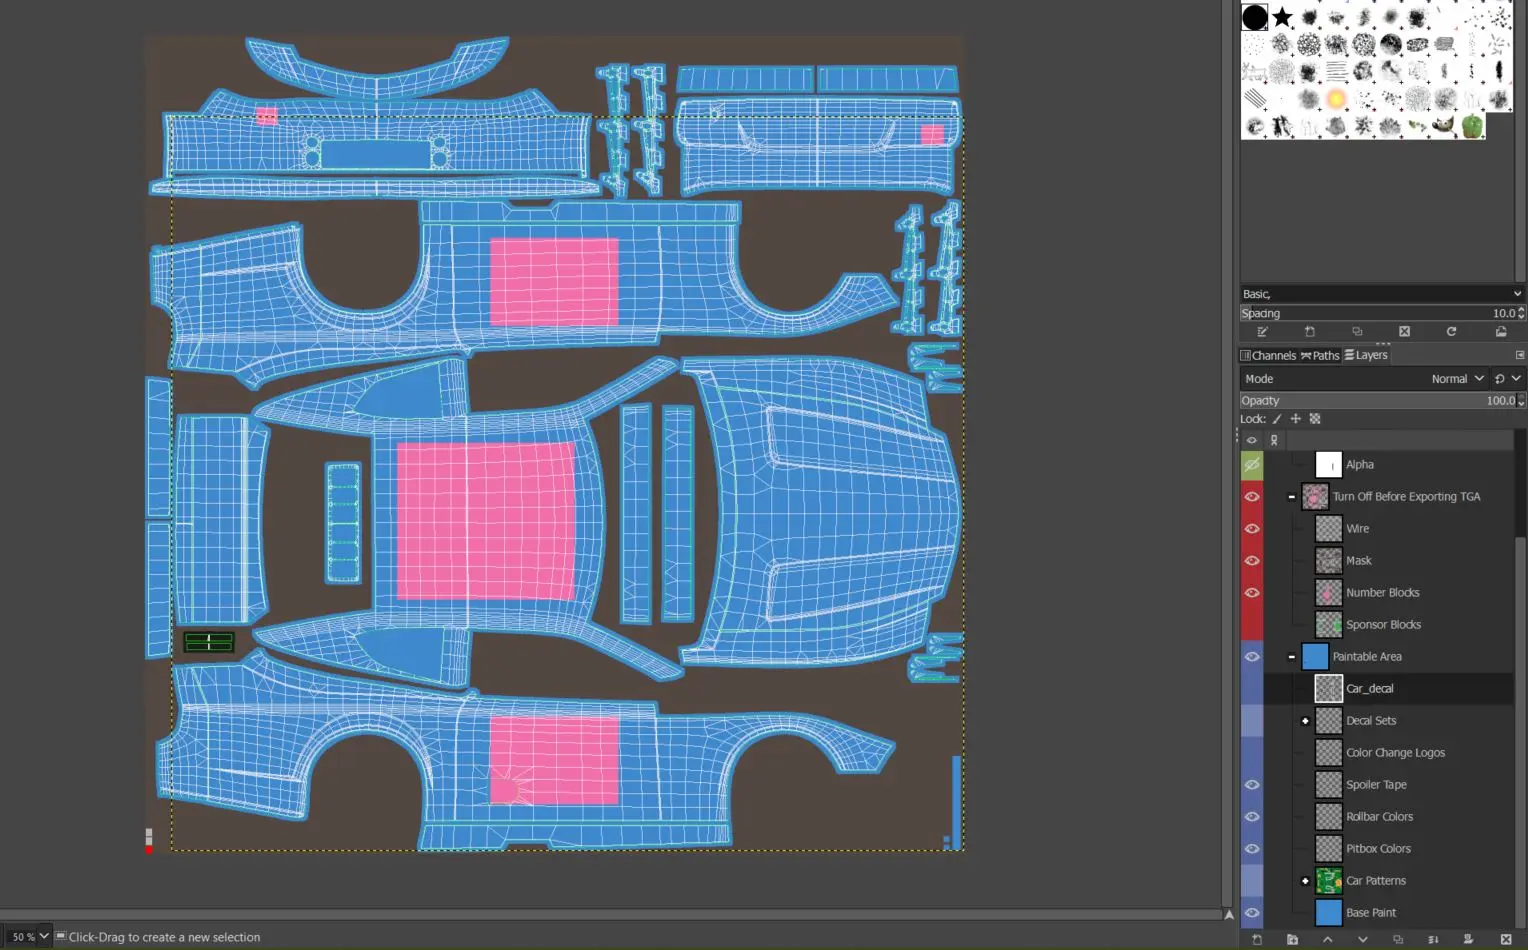
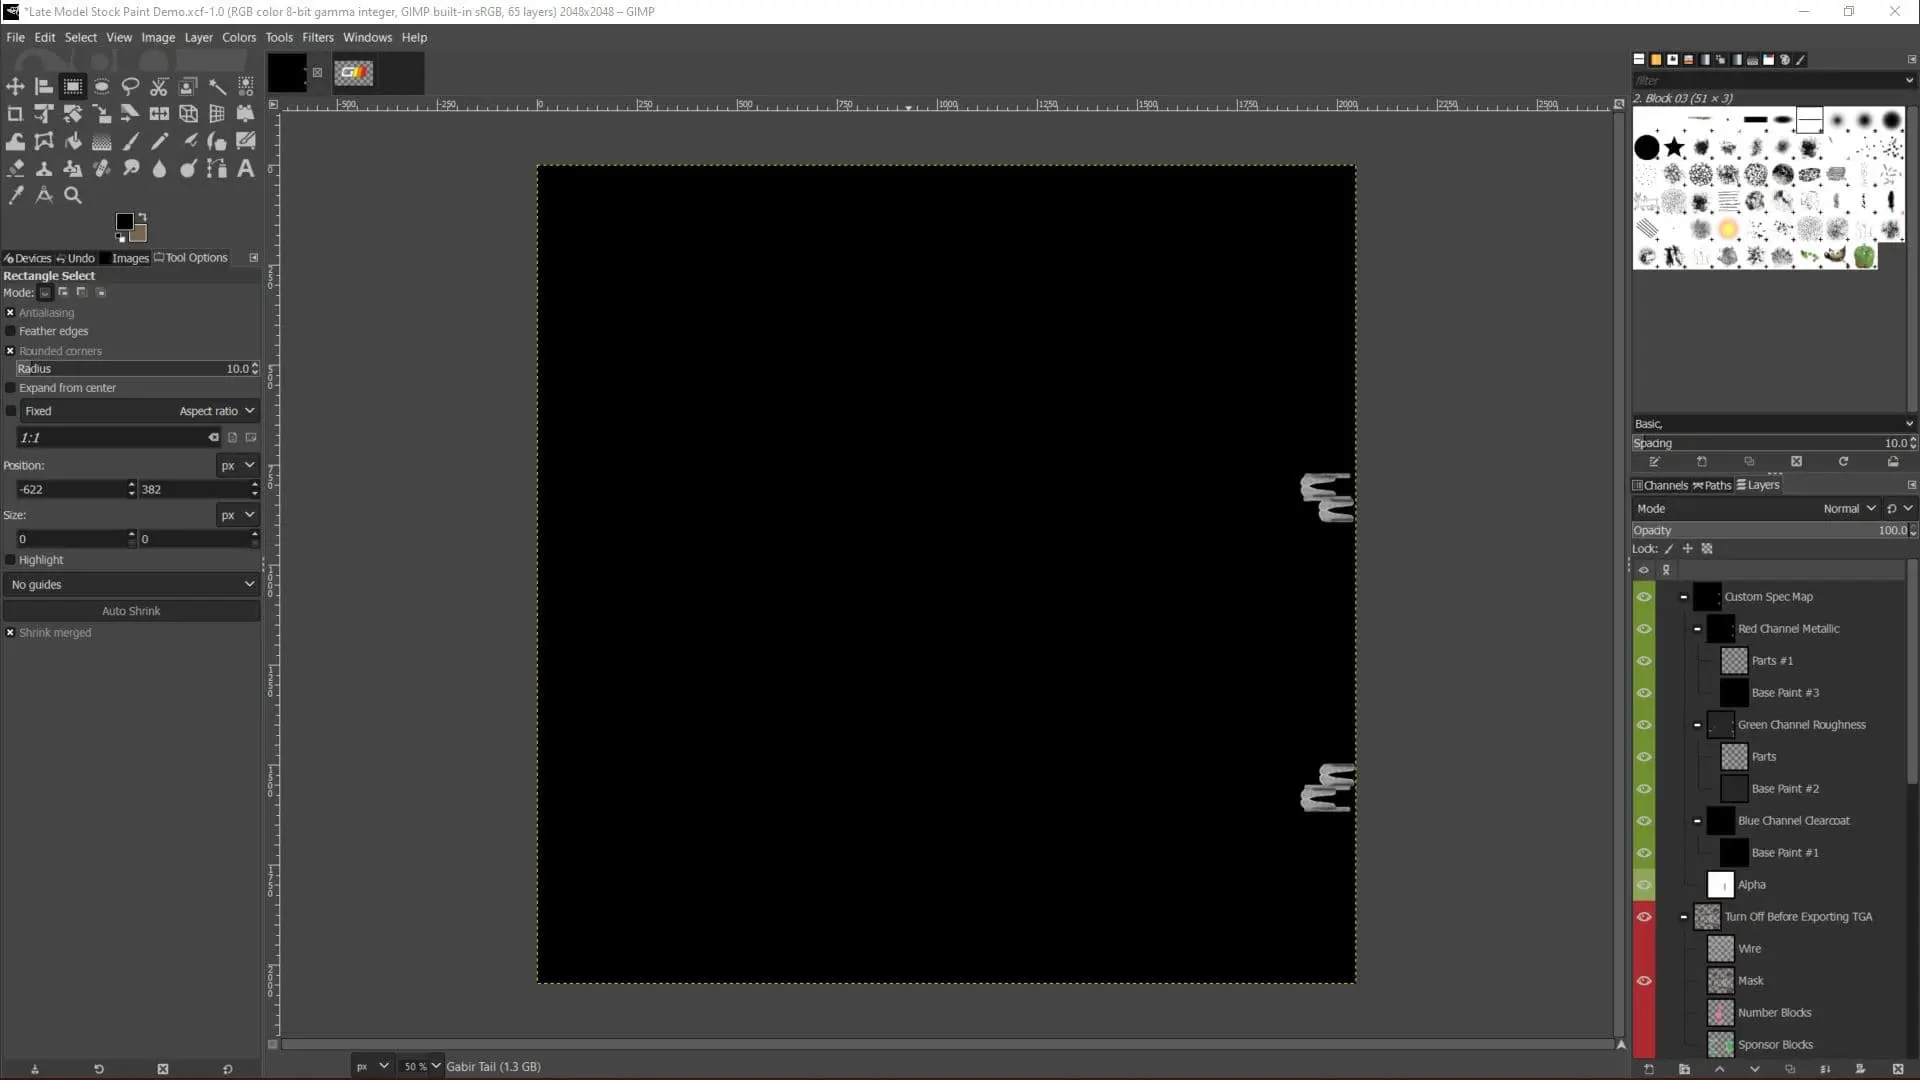
Expand the three layer tabs (bottom right in GIMP) and take a moment to turn visibility on and off for some of the hidden layers. The Spec Map layer will be confusing for now, so leave it hidden after taking a peek. Click on the Wire frame layer for a handy guide that shows where the 3D model contours often line up with the flat layer (usually white lines) and where the boundaries of the painted layer exist (usually bright green lines). If you're planning to paint a white car, we recommend selecting the Wire layer, using the color picker tool to highlight all the white lines, and then using a fill tool or other method to make the wireframe a darker color so you can see it against the white paint. We also turn on the Number Blocks so you can see where iRacing will by default place its number panels; it's a bummer to paint a beautiful livery only to discover a big number in the middle of your primary graphic.
Play with the visibility of the various layers in the BLUE section. You can usually turn off all the existing decals in a click or two, and find the small boxes (sometimes just a few pixels each) for coloring pieces like the rollbar, pit box, and pit lane tent separately from the rest of the car. Now's a good time to name and save the project!
Next, we're going to export our paint file so we can look at it in 3D in the iRacing paint viewer. We need to export it as a TGA file, so in GIMP, we use "File>Export As>" and then navigate to the paint file location. They all start with "Documents/iRacing/Paint/" but from there, you'll need the subfolder for the type of car (in this case it's a Late Model Stock, and the folder is "latemodel2023"). In that subfolder, name the file "car_<IRACING_CUSTOMER_ID>.tga" where the variable is, you guessed it, the customer ID number you wrote down earlier. So, mine would look like "car_18953.tga" In GIMP you'll export this with the default settings (RLE compression, bottom left). Now, when you check your iRacing car model in the paint section or the viewer, you should see your livery applied.
Now that we've exported our file to the correct location as a TGA, anytime we hit "CTRL-E" in GIMP, we'll be updating that file. This is super handy with two monitors, as you can make small changes and then quickly send them to the 3D renderer in iRacing, allowing you to "walk in" small movements and other minor changes, or see big placement adjustments quickly.
Now's a great time to play around and see how changes get applied to the car. Find a piece of art or a logo (we're using the Gabir Motors decal) and apply it to the hood. Paste it in as a new layer, make sure it's on the top of the pile in the BLUE "paintable area" section (the names change sometimes but the color schemes seem consistent in iRacing templates). Resize and rotate the layer until your art fits nicely on the hood section then re-export (CTRL-E), then check it out in the renderer.
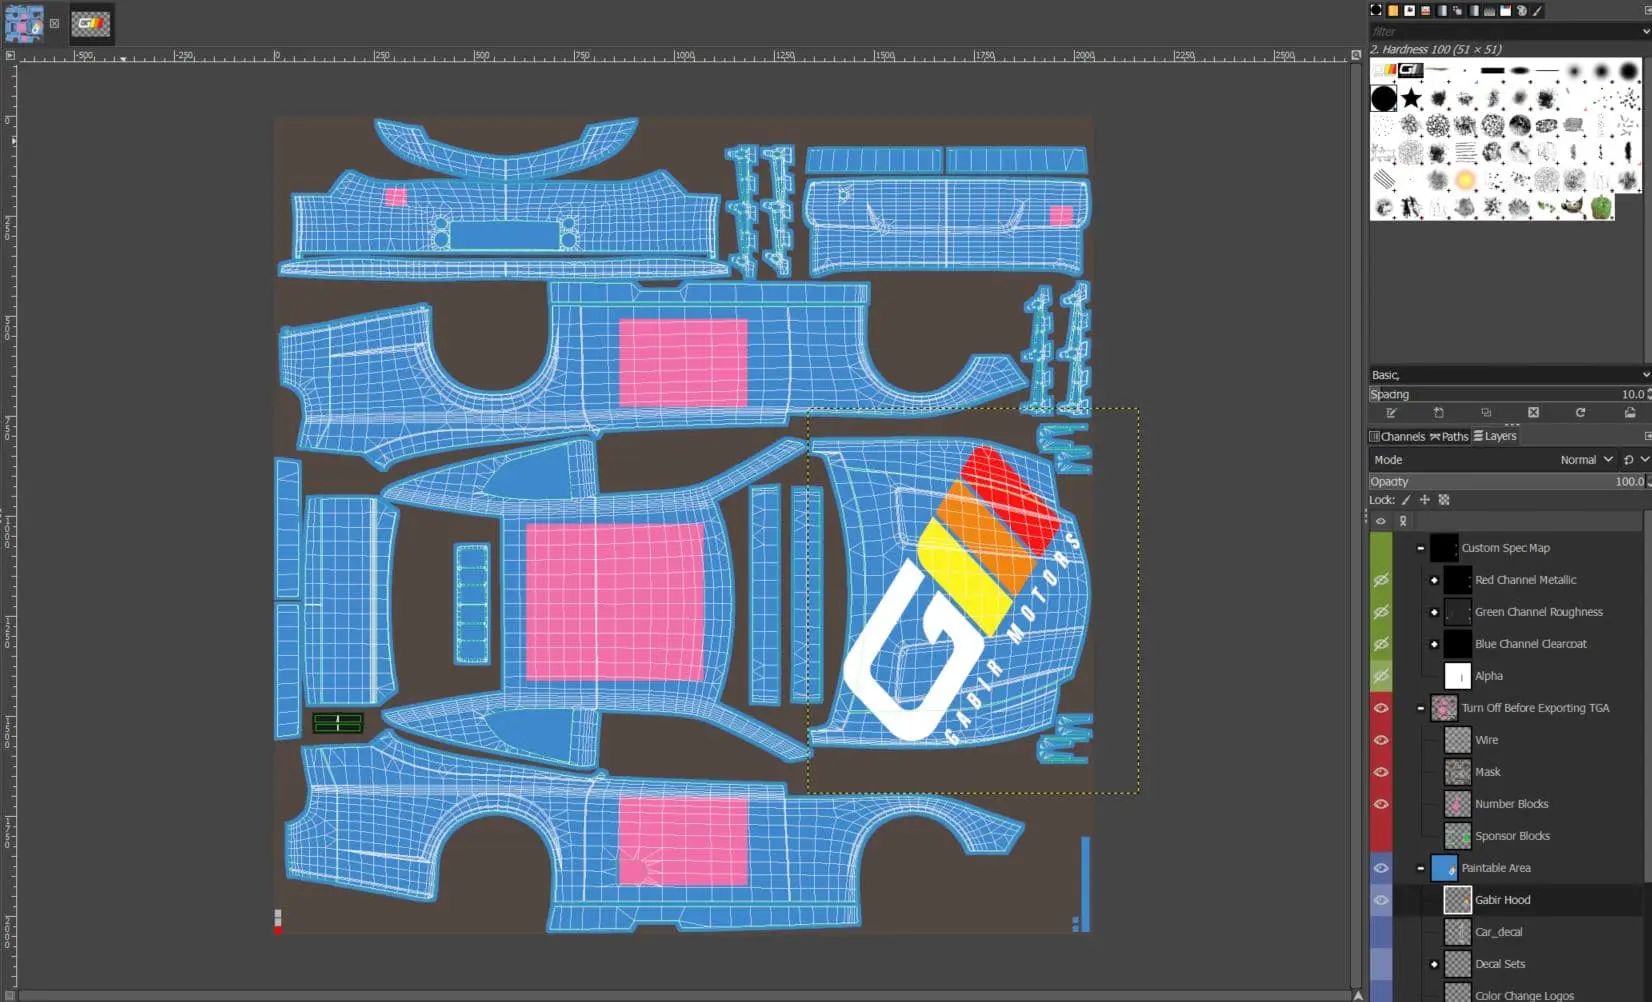
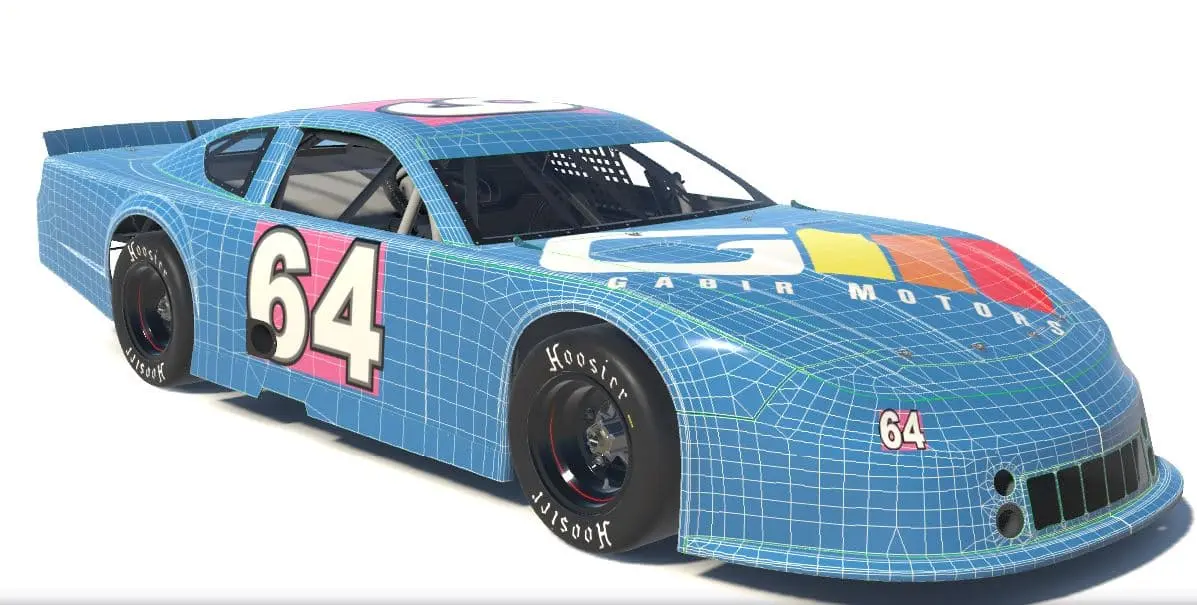
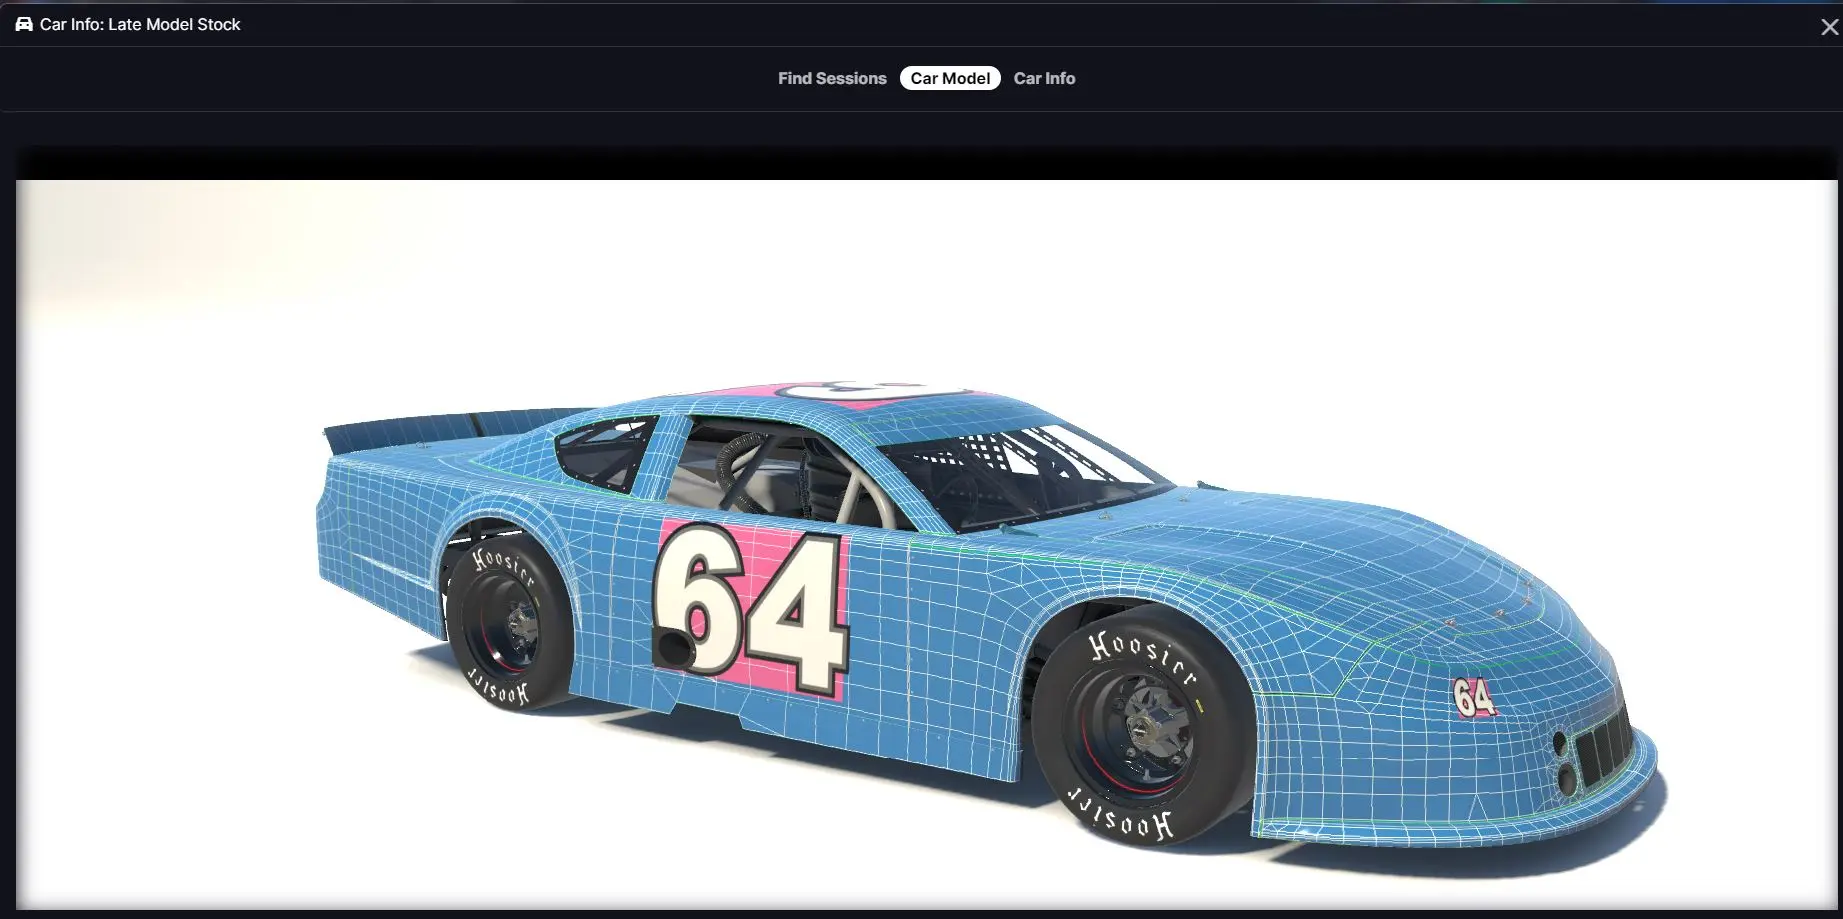
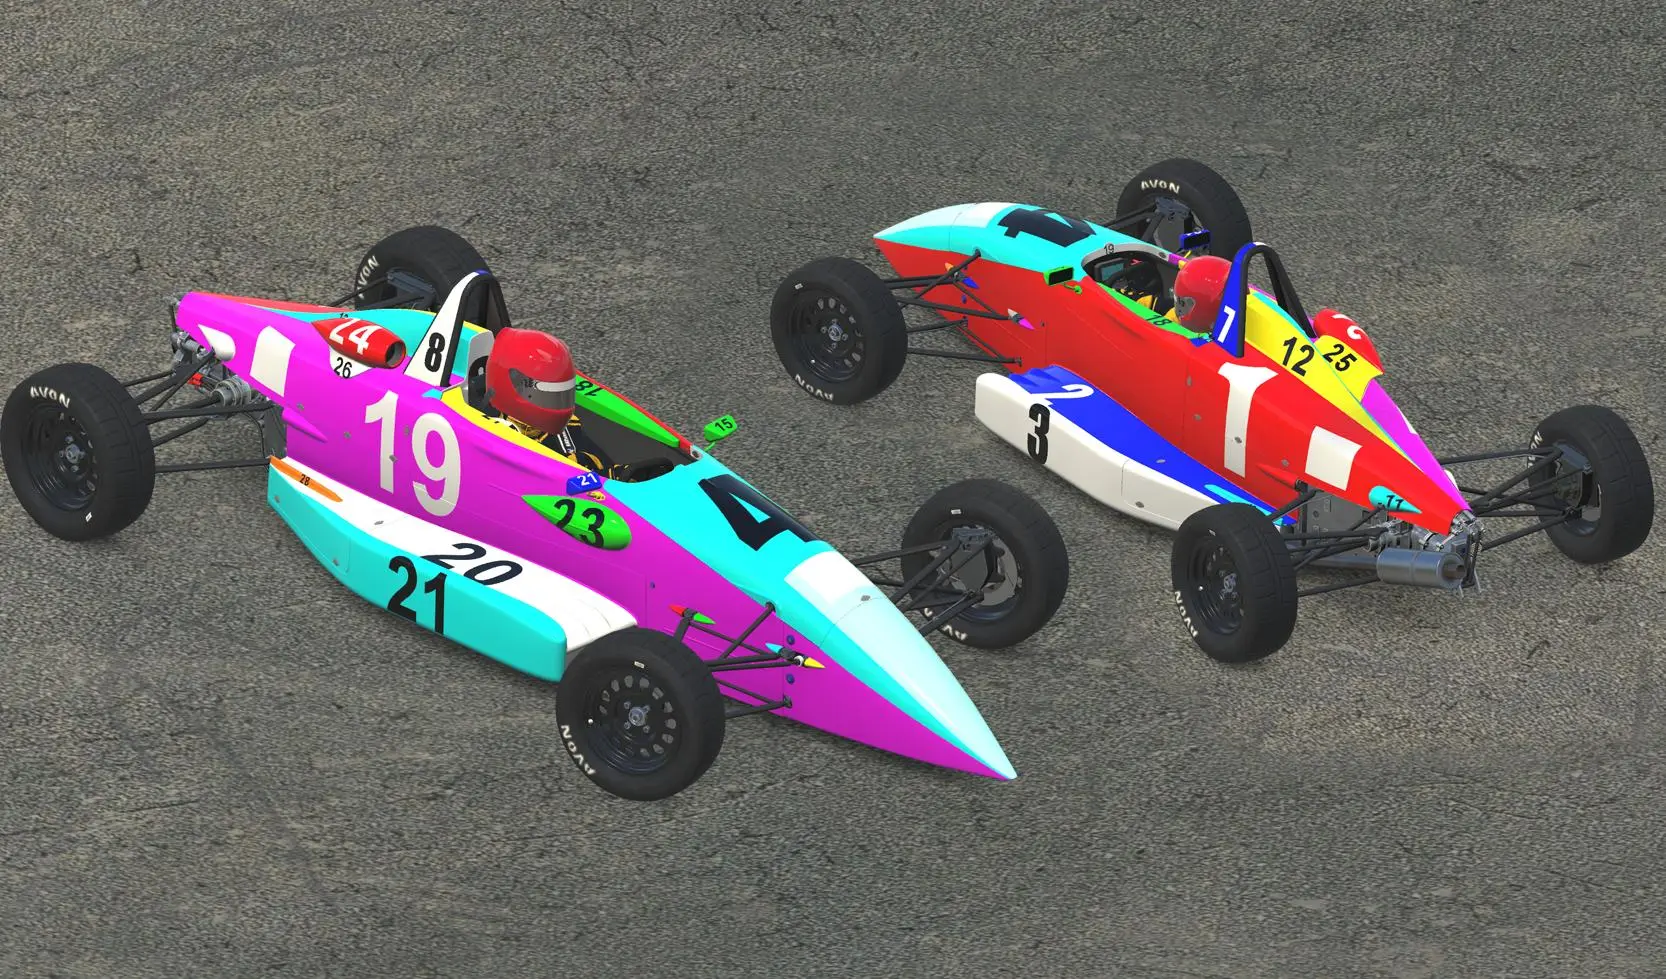
This is the punch-kick combo upon which all livery creation kung-fu is based. As you piece together your livery, you can rotate the 3D model in iRacing with the mouse, and zoom in and out with the mouse wheel, to see up close how you're doing. (At a glance our Gabir Motors logo was a touch too big and getting cut off on the tip of the G and the red M, so we'll shrink it down a tad more before the next step.)
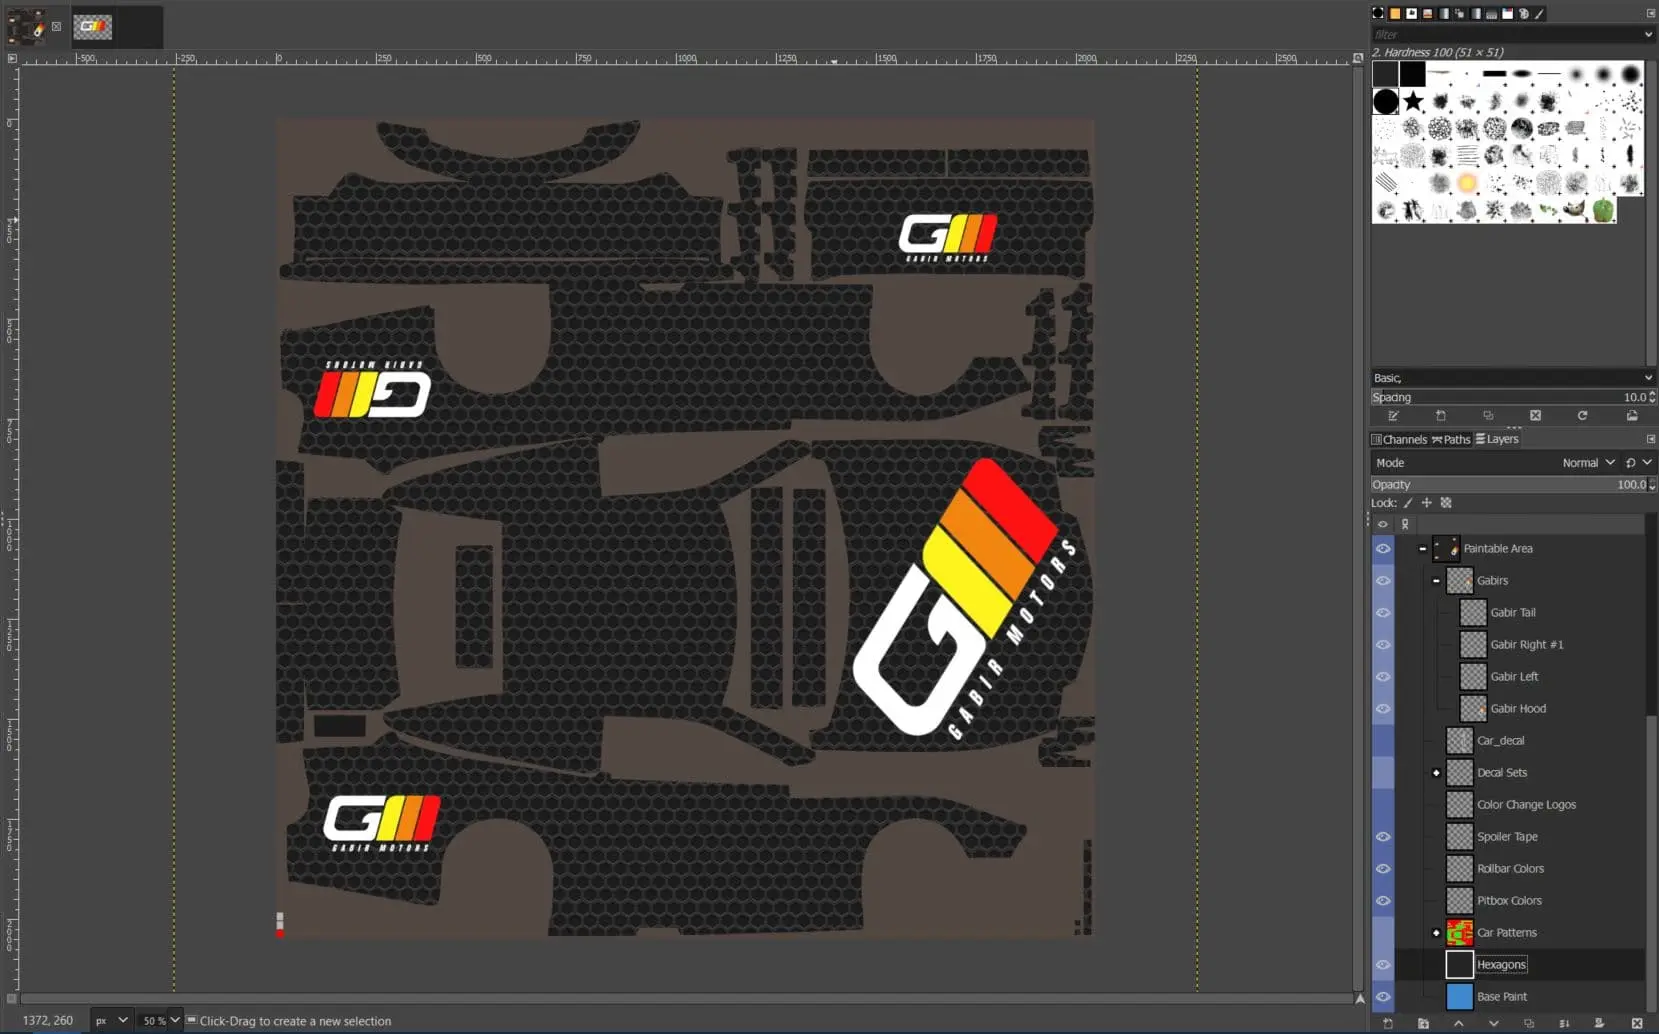
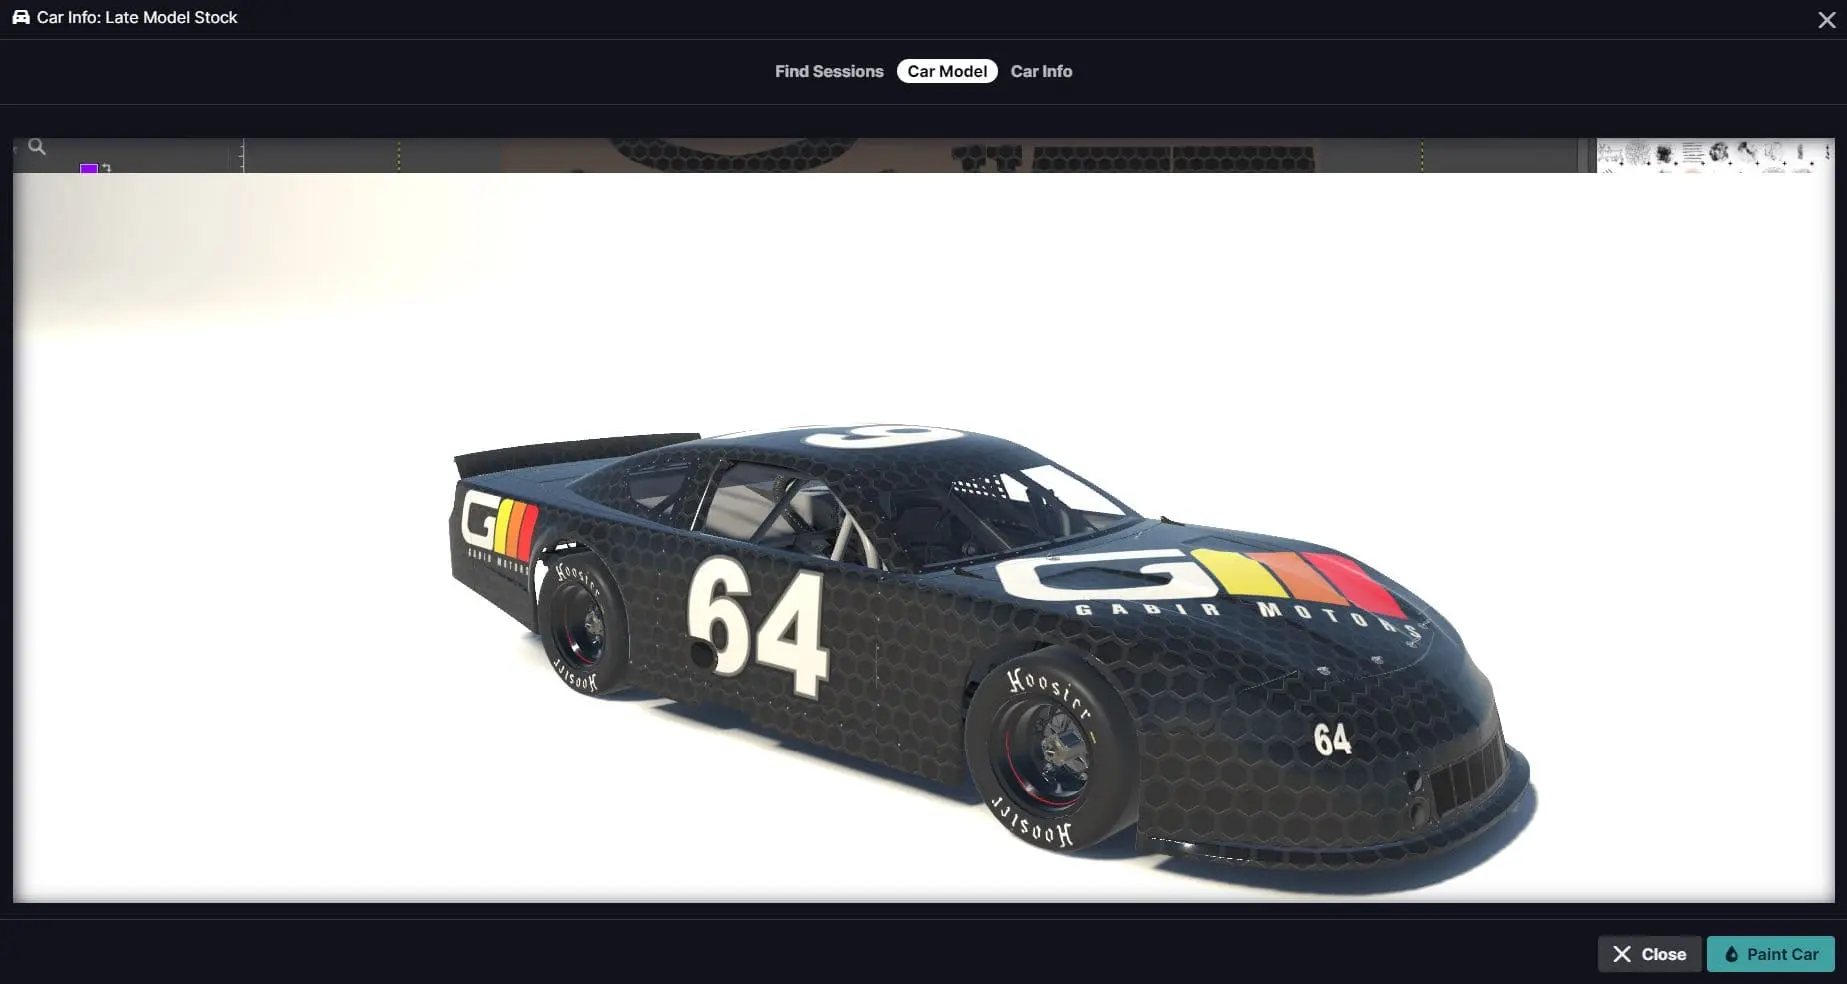
All the iRacing pattern templates exist in a subfolder in the BLUE section ("Car Patterns" in this case), and there's nothing to stop you from finding a pattern you like in that folder and color changing it to meet your needs. Alternatively, you can get as hands-on as you want, even sketching out your own art if you're so inclined and talented. Let's give our demo paint here a bit more splash by applying a simple geometric pattern as the background, and adding a few more Gabir Motors logos on the flanks and rear.
Some cars are a nightmare of small paintable sections that don't line up on the template anywhere near their on-car location. Fortunately, there are livery angels (foremost among them Clyde Coman) who have taken the time to color and number each panel and upload their work, which is a tremendous help when making a livery on a complex car.
Make it Stand Out with a Spec Map
The ability to adjust Spec Maps was added a few years ago and was recently enhanced, giving robust control over the textures available underneath and on top of a paint job. The three channels available at this writing are Metallic (0-100 percent in the red value), Roughness (the green value) and the recently added Clearcoat (blue channel). The best way to get a sense of what these values do in combination is with the amazing Gabir Motors Spec Map Previsualization Tool. Spend some time with the sliders to see what kinds of combinations yield what results on different colors. For example, note how a white-colored car with a full chrome finish (max metallic, minimal roughness) becomes very shiny silver/grey, or how a vibrant red-colored car becomes a much darker hue at full metallic/roughness values.
Here's the nutshell version of what's going on. When you export an appropriately named TGA file for iRacing to turn into a spec map ".MIP" file, iRacing looks at the red, green and blue color values for that TGA file and converts them into the metallic, roughness and clearcoat values for any given pixel on the 2048x2048 image. It's easier to work with them in layers, but iRacing doesn't really care that they're in layers, it only cares about the final combined values. If something's bright red on the outgoing file, that's gonna come out fully chrome, 100 percent red channel, no green or blue. If a particular section is white, it's likely to be a flat dull mess of maximum metallic, roughness and faded clearcoat values.
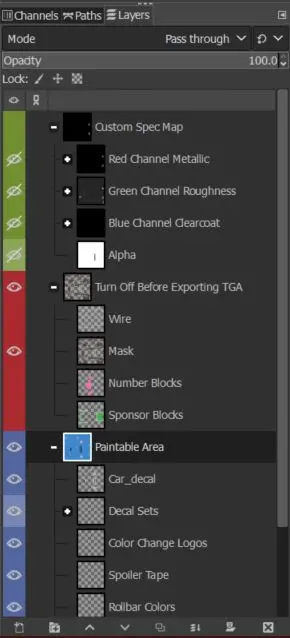
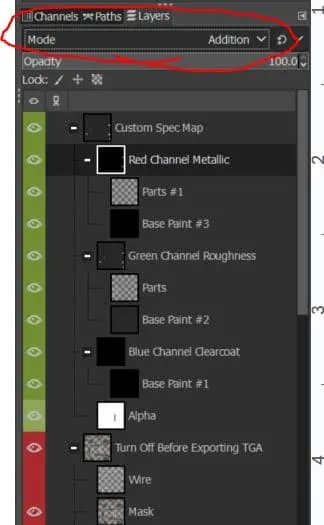
Now that you see what's possible and have a basic understanding of the goal, enable the GREEN Spec Map layers on your livery file in your paint editor and open the subfolders. If you're in GIMP like we are, you've discovered your first problem; You're only seeing the top layer (Red Channel Metallic), and that's in black and white. A few extra steps will get you seeing exactly what the Photoshop users see, and that's a composite of the Red, Green and Blue color channels.
Let's start at the bottom layer in this stack: Alpha. This car has Alpha channel data, and we don't really need to mess with that layer. A few cars have actual transparent floating layers on the windshield (992 Porsche Cup and V8 Supercars come to mind) but most cars don't mess with this area. Watch the author's brief summary of how to deal with this in GIMP here:
Our next layer group up is Blue Channel Clearcoat. By default on most cars, this layer is set at pure black, a value of 00 in the hexadecimal RGB array (where 00 is zero percent and FF is 100 percent). At a blue channel hexadecimal value of 10 (approx 5 percent, or 16 on the 0-255 scale for color intensity), a super-shiny clearcoat will appear on top of the painted layer. Increasing the blue value above this point will start to fade the clearcoat, up to the 100 percent value, where it looks like a junkyard car that's been in the sun for ages. Note that clearcoat can visually override the metallic/roughness values underneath. We're going to leave this one at full black, 0 percent, for now.
Green is the first layer group we're going to really mess with. First, in GIMP, click on the "Green Channel Roughness" layer group (the root of that folder) and note at the top where it says "Mode Pass Through." Hit the menu arrow next to "Pass Through" and switch this channel to "Addition." Go ahead and do the same thing for the Red Channel Group.
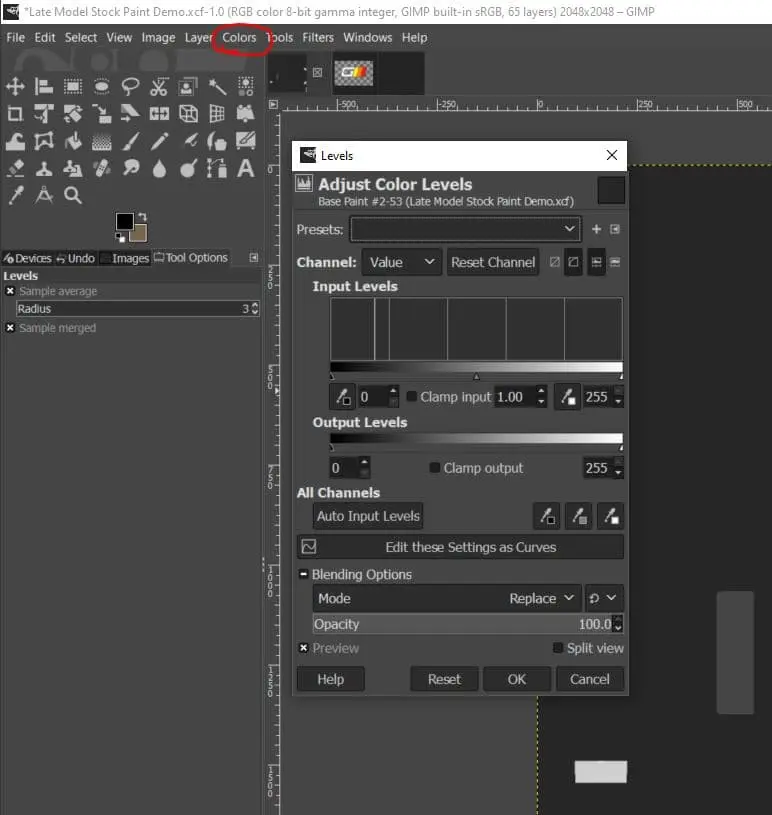
Now that you've got the Red and Green layer groups showing through, we need to take care of this monochrome problem. Click on the Base Paint layer in the Green Channel stack and then select "Colors" from the menu. Then select "Levels."
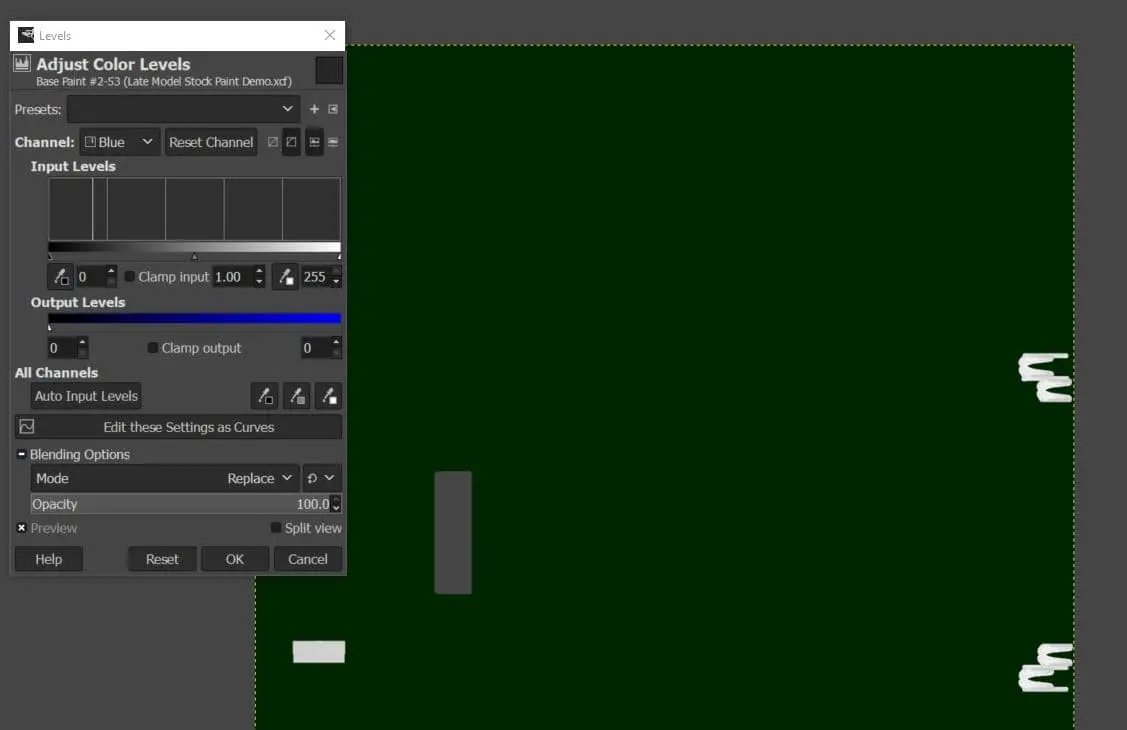
Now, adjust the Red and Blue values down to zero without touching the green value. It's wise to save your settings as a preset; we named ours "Green" because we're not very original, but confusion levels have remained low.
Now, apply the same pure green filter to the Parts layer in the Green Channel Roughness layer group. Then, using the same technique, make any of the layers in the Red Channel Metallic group pure red by removing their green and blue components in the Levels menu.
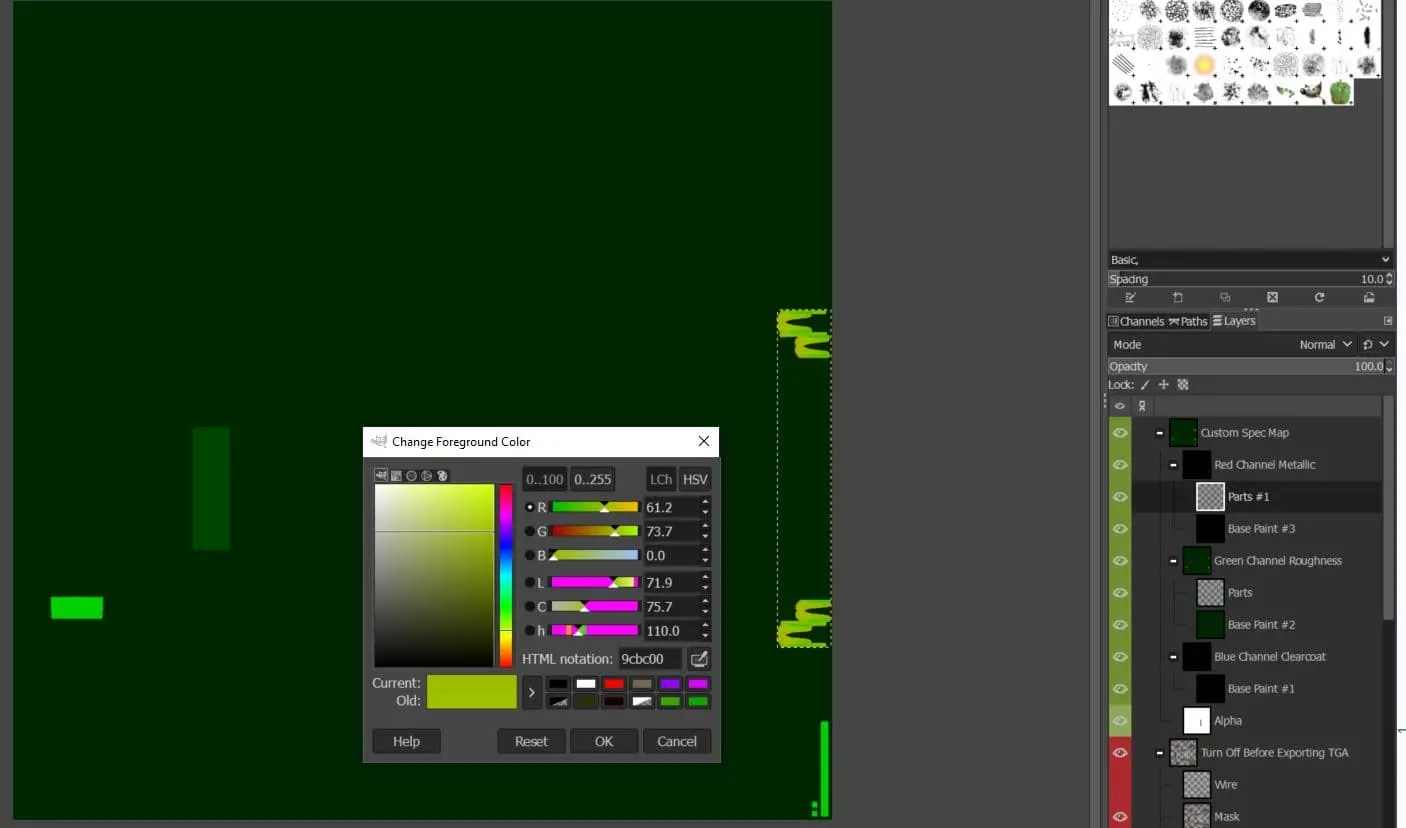
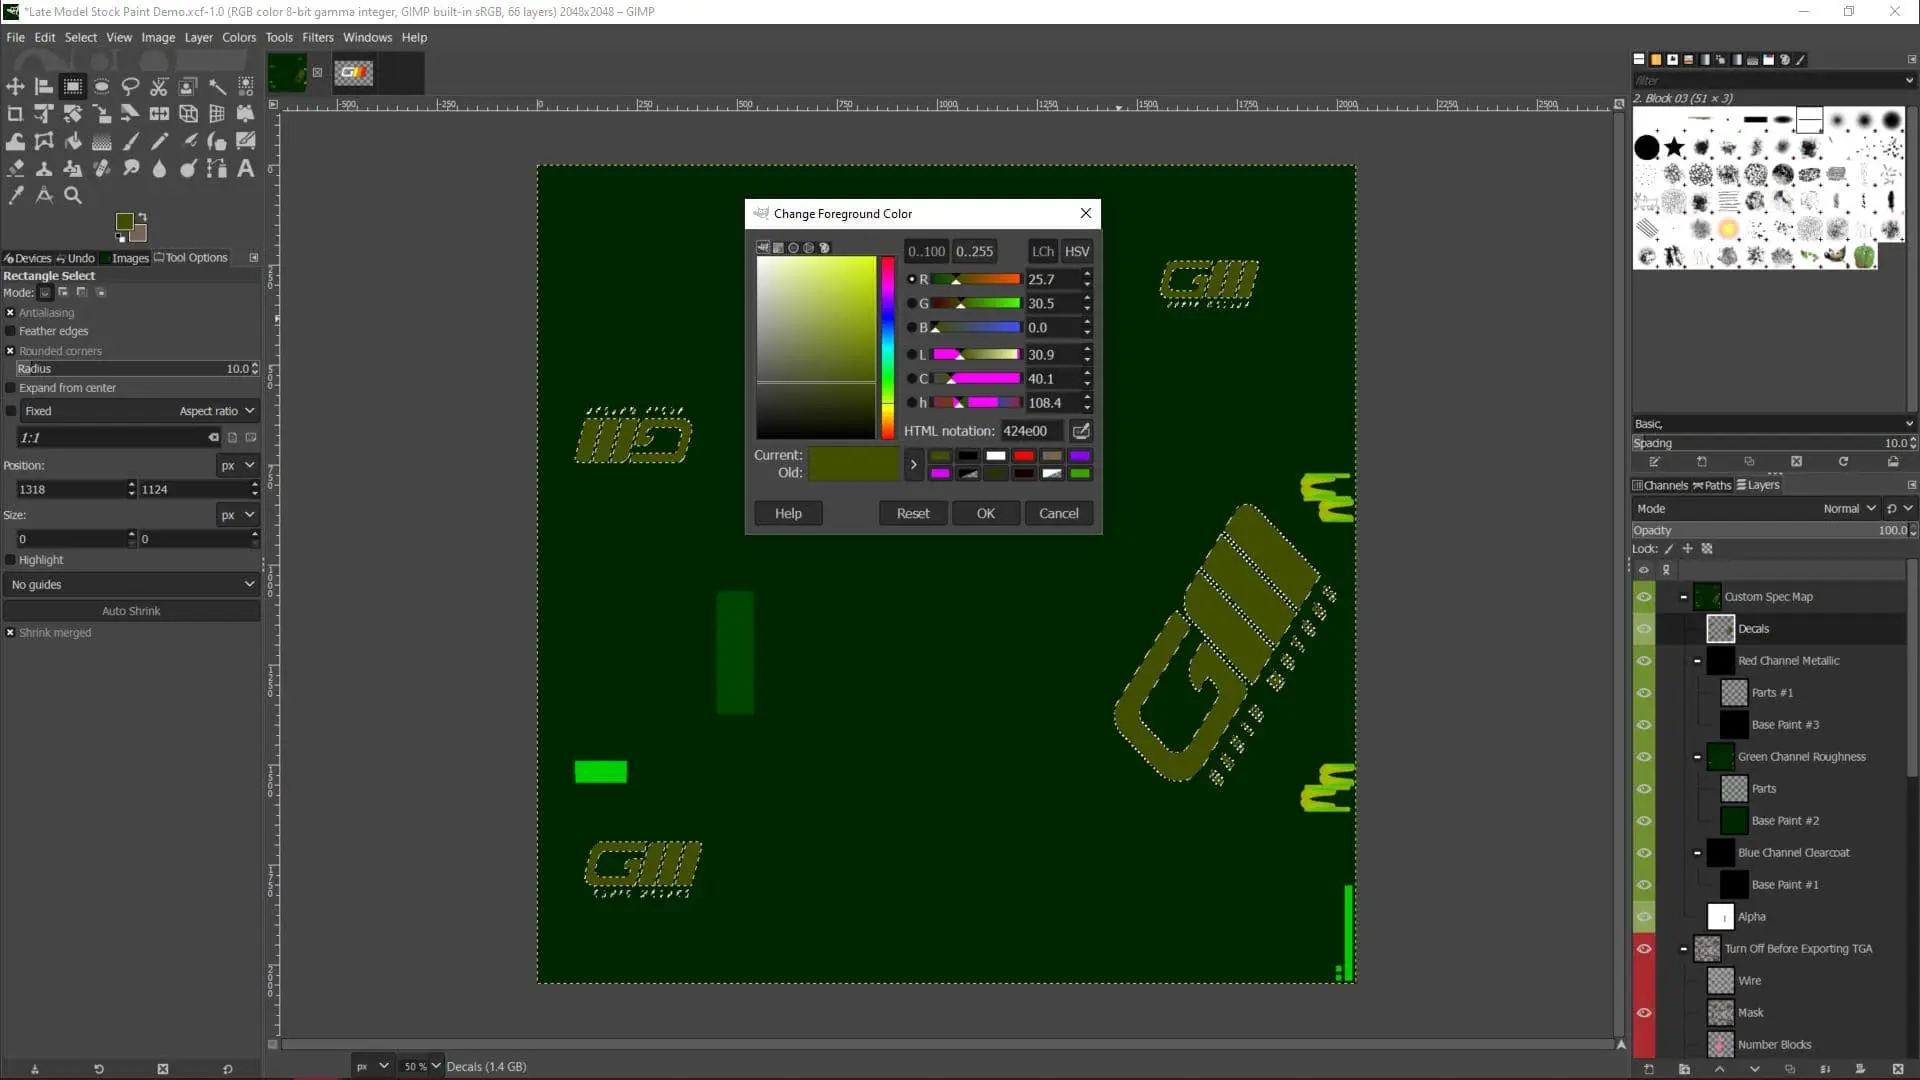
The end result will vary by car and design, but you should be seeing a mix of Red and Green colors blending into the final visible image. Wherever you see yellow, that's a mix of metallic and roughness, for example. This oval track car doesn't have many shiny bits, but there are a few yellow areas (presu"mably metal hardware). If we use our color picker tool, we can see the percentage of each color; this one is 61.2% Red (metallic), 73.7% Green (rough), and 0% clearcoat (no clearcoat whatsoever). Demo Spec Map
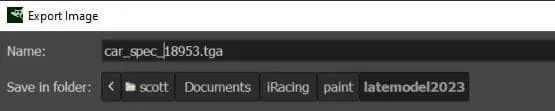
Now we've got the spec map for the car back to "stock," where it appears in GIMP as it would in Photoshop. Just to get it locked in and make sure nothing's janky, let's export this file and have iRacing turn it into a .MIP file. Open up the "Export As" dialogue in GIMP, then change the filename to "car_spec_<IRACING_CUSTOMER_ID>.tga" using your unique customer ID from before. With iRacing open and viewing the car in one of its 3D visualization modes, it should automatically generate a .MIP file using the same filename structure. You can confirm this by checking the actual Documents/iRacing/Paint subfolder. iRacing won't generate the file unless you're actively looking at the 3D model in the user interface.

Now let's get a little fancy. We're going to duplicate our Gabir Motors decals in our spec map layer, but in a single color so they stand out as a different layer. (Do this quickly by putting all your intended art elements in a layer group, using the color select to select everything around the layer, then invert selection and you should have them all trapped. We're filling ours in with a guessed value (based on some experience) of about 25 percent metallic and 30 percent rough Demo Spec Map. Putting this layer above all the other stacks ensures no matter what else we do, our Gabir Motors "decals" will stay consistent and true.
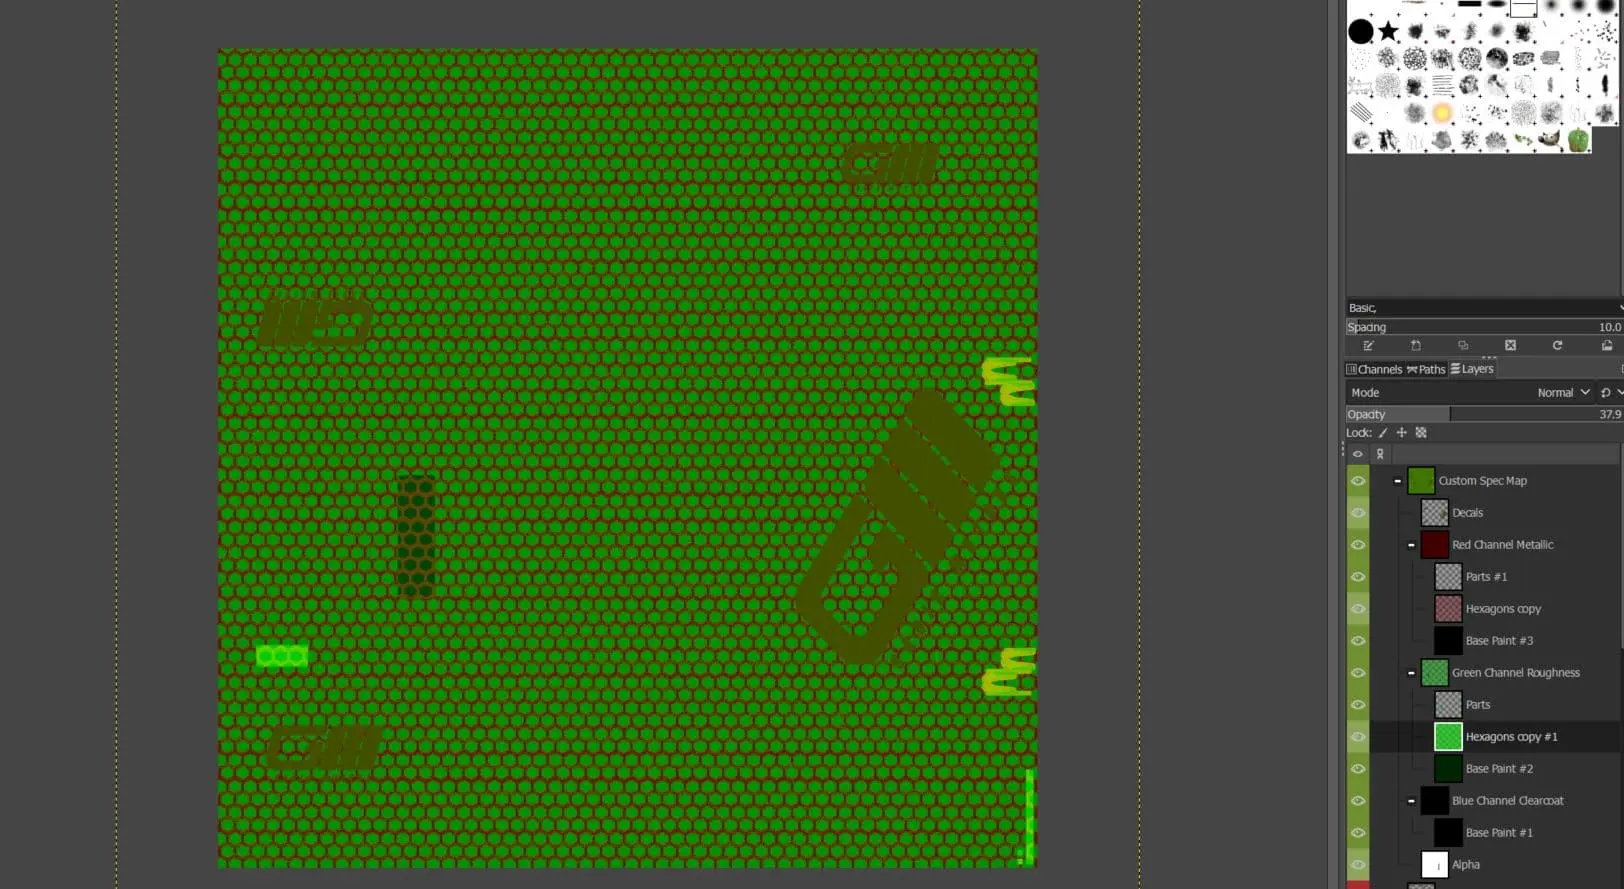
Next, we get a little nuts with our hexagon base layer. Mess with values, trying selecting and deleting stuff; we made the centers of our hexes much more green (towards a satin/matte value on the roughness scale) while making the "outline" a purer red. The end result starts to really pop, and you can see how having the Gabir Motors logos on top of everything because they're on their own separate layer ("Decals" at the top of the layers stack).
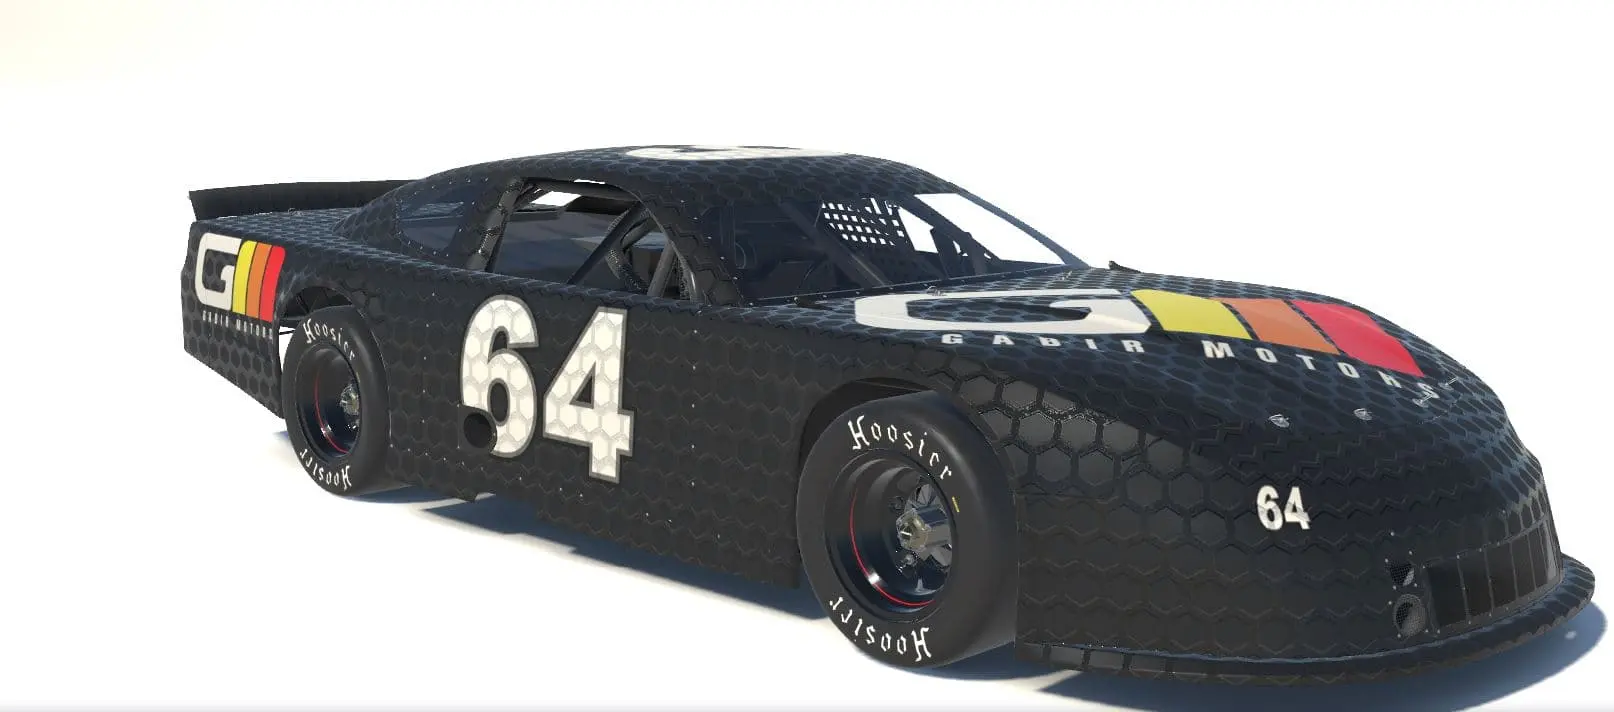
As with the paint layer, there are few limits to the complexity of what you can achieve, as long as it fits in 2048x2048 pixels. Some of our favorite creations have ridiculously complex paint layers and spec maps after hours of tweaking and modifications, but the in-sim results can be stunning.
To upload your work to Trading Paints, simply copy your final result TGA in the /paint folder and give the copy an easy-to-find and identify name. Then give the same name to the .MIP file, and upload that to Trading Paints as well when you're uploading your livery.
Happy painting!

Help your fellow iRacing livery creators!
Advanced Livery Creation Tips
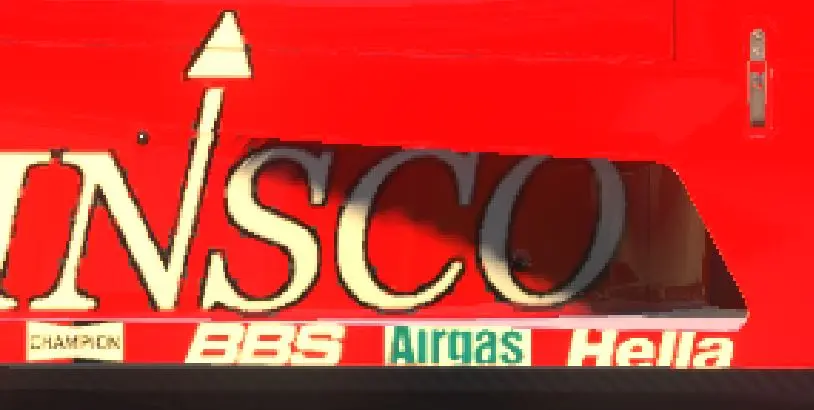
Big and Bold Works Best!
iRacing has difficulty in the sim drawing clean thin lines between differing colors—for example, a pixel-width black outline between white text and a red background—can result in some fairly garbled visual data at the seams as distance from the object increases. Try to avoid high contrast fine details like this when you can get away with it, broader bolder shapes hold up best at all ranges.